Hi there! 🙂
If you’re looking for a way to highlight your gaze and improve the appearance of your eyebrows, you’ve come to the right place! Eyebrow lamination is one of the newest and most innovative eyebrow styling methods that is becoming increasingly popular in the world of beauty. It keeps your eyebrows looking full, conditioned, and beautifully lifted for weeks and gives you full control over their shape and definition. In today’s post, you’ll learn what brow lamination is, how easy it is to do it at home, and what you’ll need to get it done. Get ready for a bit more information and check out my mini-ranking of my best kits for brow lamination at home 🙂 Enjoy!
What is eyebrow lamination?
Are you curious about the eyebrow lamination process? You should know that it consists of several stages. The first is a thorough cleansing of the eyebrows and skin around them from makeup and any impurities (sebum, residues of skin care products, etc.). Next, a special lifting solution is applied, which opens the hair cuticles allows them to absorb the products better, and ensures you can change the shape of your brows. After this stage, a special product is applied to fix the shape of the arches. It ensures you can maintain the laminated brow effect for several weeks.
The benefits of eyebrow lamination are invaluable! 🙂 First of all, the eyebrows become visually thicker, more defined, and fuller, which ensures a stunning but very natural look. Any gaps and sparse areas are no longer visible. The eyebrows are styled into a desired shape, and their color is more intense. They become moisturized and shiny. In addition, thanks to brow lamination, their daily styling is faster and easier, which helps save some time during your morning routine. All you need to do is to brush through them with a spoolie!
How to perform brow lamination at home?
If you want beautiful, thick, and naturally styled eyebrows, then DIY brow lamination at home is the perfect solution for you. And it’s easier than you think! All you need is a good brow lamination kit and less than an hour. With a professional brow lift kit, you can save time and money by doing the treatment yourself at home – it’s fast and easy 🙂 Laminating eyebrows at home with a ready-made kit gives you full control over the final result. You can choose the shape and definition of your eyebrows yourself. DIY brow lamination at home with a complete kit is very easy even for beginners. The kit should include detailed step-by-step instructions to help you perform the treatment safely and efficiently.
One of the main reasons to opt for eyebrow lamination at home is the huge savings. Visiting a beauty salon can be time-consuming and expensive, especially if you need to get the treatment frequently. Instead, you can perform the treatment at your own pace at home without having to adjust to your beautician’s schedule!
Which is the best kit for brow lamination at home?
Here are 4 of my favorite eyebrow lamination kits! 🙂
- Nanobrow Lamination Kit
- Iconsign Brow Lamination Kit
- Brow Bomb Brow Lamination Starter Kit
- Thuya Brow Lamination Kit
➜ 1. Nanobrow Lamination Kit
Of the several at-home brow lamination kits I’ve had the opportunity to test, Nanobrow Lamination Kit did the best job on my eyebrows. Not only is it the most cost-effective solution, but it also ensures the results of one treatment last as much as the manufacturer assures. On my eyebrows, they lasted about 7 weeks. In addition, the entire kit lasts for about 10 individual brow lift treatments. It simply pays for itself! 🙂 The elegant box contains lifting and fixing solutions – two pump bottles, which prevent bacteria and air from getting inside the products, eyebrow glue with a spoolie, disposable accessories, a brow brush, and a spoolie. There are a lot of positive online reviews about the Nanobrow brow lamination kit. It has been tested by many bloggers and influencers, which made it extremely popular lately. No wonder! It features great formulas of laminating products that do not irritate the delicate skin around the eyebrows, convenient accessories, clear step-by-step instructions (both included in the box and the one on the brand’s website), numbered bottles, and a beautiful design at a great price. I know that owners of all types of eyebrows – from stiff and thick to barely-there ones in need of extra definition – will like this kit. Nanobrow Lamination Kit is easy to use and requires no special knowledge or experience in styling eyebrows. With this brow lift kit, you can create a beautiful brow look without leaving home or spending a fortune at a beauty salon. For me, it’s a 10!
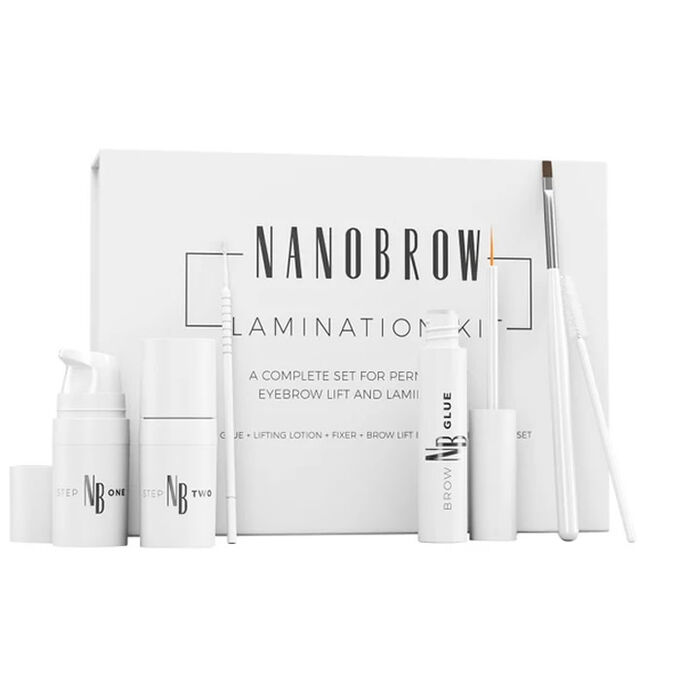
Nanobrow Lamination Kit – contents:
- Brow glue
- Lifting lotion
- Fixer
- Brush
- Spoolie
- 10 disposable applicators
✓ Price – attractive
✓ Formulas – very good
✓ Efficiency – high (10 treatments)
✓ Durability of effects – 7 weeks
✓ For home and professional use
✓ My rating – 9.7/10
➜ 2. Iconsign Brow Lamination Kit
This kit is my latest purchase. I like it for the pretty pink color! 🙂 Iconsign Brow Lamination Kit is one of the more popular brow lamination sets for home use available on the beauty market. But is it as good as they say about it online? After applying the products from the kit, you can get a pretty long-lasting effect, which lasts for about 4-5 weeks (this was in the case of my eyebrows, but the results can vary). Thanks to the DIY brow lamination treatment, you do not need to style or correct the shape of your eyebrows every day, which saves a lot of time. Following the lamination treatment with this kit, eyebrows look thicker, more defined, and elegantly styled yet still natural. The Iconsign kit is especially recommended for owners of sensitive or problematic skin. The products contain safe ingredients that do not irritate the skin or eyes. There is, in my opinion, one drawback of this kit for brow lamination at home – it lacks disposable applicators or a spoolie – fit only contains brow brushes, which are not the most convenient tools for applying, for example, a lifting product. In addition, the package includes a trimmer and scissors for trimming unruly eyebrows. They are cool accessories that I’m sure women with unmanageable brows will enjoy 🙂 However, remember not to get rid of unwanted brow hairs just before the eyebrow lamination treatment, as it is not advisable.
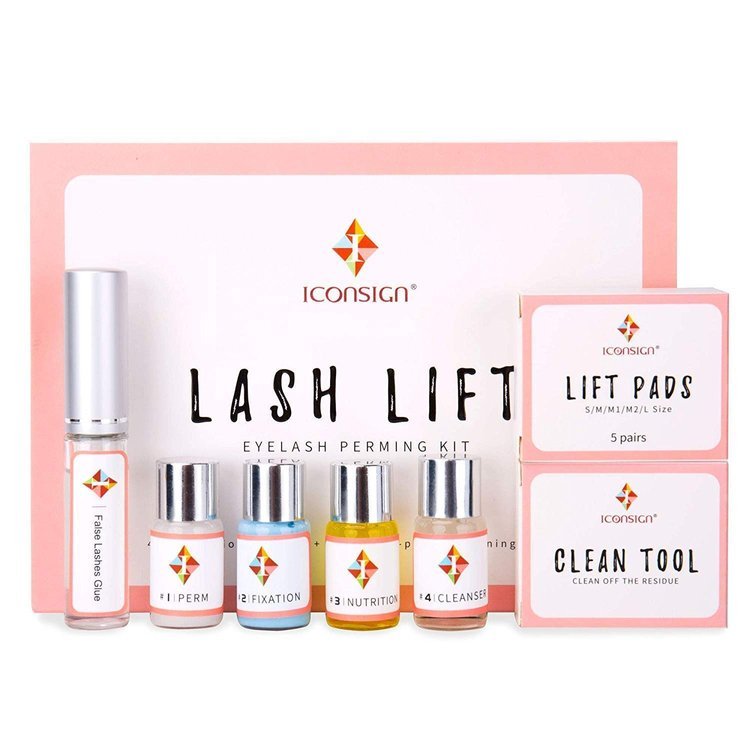
Iconsign Brow Lamination Kit – contents:
- Lift Glue
- Perm Lotion
- Fixing Lotion
- Brow trimmer
- Brow scissors
- Disposable eyebrow brushes
- Micro brow brushes
✓ Price – favorable
✓ Formulas – good
✓ Efficiency – average (6 treatments)
✓ Durability of effects – 5 weeks
✓ For home and professional use
✓ My rating – 8.2/10
➜ 3. Brow Bomb Brow Lamination Starter Kit
Brow Bomb Brow Lamination Starter Kit is another kit I’ve tried and tested for DIY brow lamination at home. Performing brow lamination with this kit requires a bit more experience, and the ingredients take longer to penetrate the hair structure and work. All in all, the treatment took me about 1.5 hours, and my eyebrows looked shinier, visually thicker, and more defined. Unfortunately, the Y-shaped combs from the kit didn’t live up to my expectations, I prefer traditional brushes, spoilers, or disposable applicators, as it’s easier to distribute the products on the brows with them more precisely. On top of that, the form of sachets instead of bottles or tubes – it’s not very convenient in my opinion as it’s hard to measure the right amount of product, and once opened they can’t be resealed, which makes it necessary to use them up quickly (I did my eyebrow lamination with my mother and sister). Although I didn’t like some of the items in this eyebrow lamination kit, the quality of the included formulas is quite good. The formulas are enriched with cocoa butter and panthenol, among other ingredients. The effects lasted about 3-4 weeks on my eyebrows.
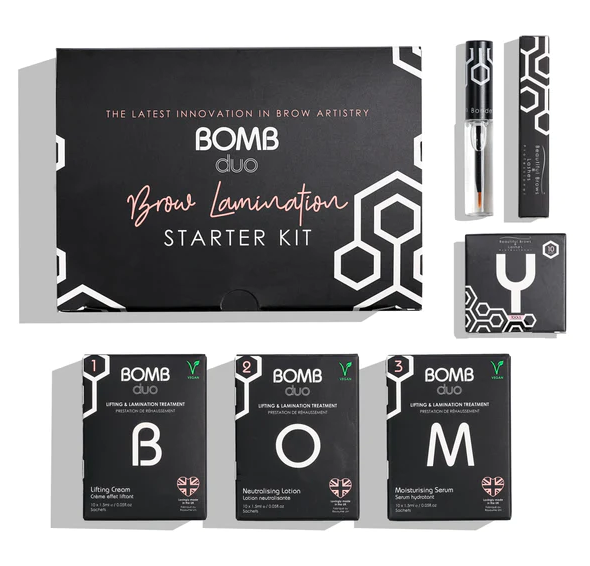
Brow Bomb Brow Lamination Starter Kit – contents:
- Brow & Lash Bomb Lifting Cream Sachets
- Brow & Lash Bomb Neutralising Lotion Sachets
- Brow & Lash Bomb Moisturising Serum Sachets
- Bonding Serum
- Brow combs
✓ Price – high
✓ Formulas – good
✓ Efficiency – high (40 treatments)
✓ Durability of effects – 3-4 weeks
✓ For professional use only
✓ My rating – 7.8/10
➜ 4. Thuya Brow Lamination Kit
This easy-to-use kit ensures you get lifted and gently thicker eyebrows and eyelashes with a nice curl without leaving home. Unfortunately, there’s a catch – Thuya’s brow lamination kit doesn’t include brow tints in colors other than graphite, so if you want a different shade, you’ll have to buy a tint in the color of your choice separately. Likewise with lash lamination – to do it at home, you need to buy lash glue and eyelash rollers, which are unfortunately missing from the kit. As for applicators, there is only a reusable brush – there are no disposable applicators or at least a spoolie to comb and style unruly brows. The eyebrow laminating products come in disposable sachets, which I think is not a very practical solution. Overall, this is a pretty good kit, however, it came in last place for a reason. It fulfilled its purpose, but it didn’t impress me much.
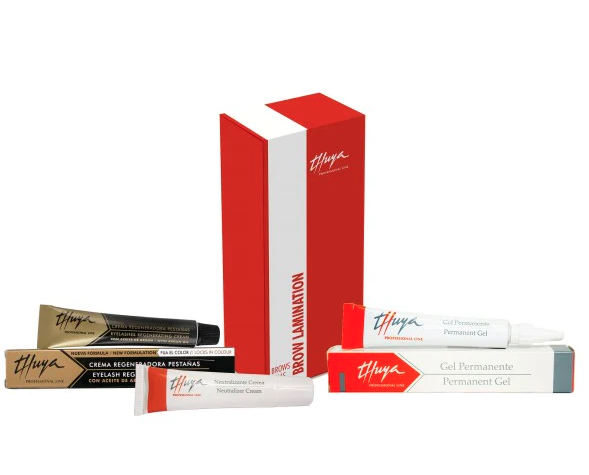
Thuya Brow Lamination Kit – contents:
- Perming gel
- Neutralizer
- Pre-smoothing Brows
- Brow tint
- Makeup remover
- Special product container
- Brow brush
✓ Price – high
✓ Formulas – good
✓ Efficiency – high (10 treatments)
✓ Durability of effects – 3-4 weeks
✓ For home and professional use
✓ My rating – 7/10
What not to do before and after DIY brow lamination at home?
If you decide to laminate your eyebrows at home, keep in mind that this treatment requires you to prep your brows first and features aftercare requirements, such as avoiding contact with water for 24 hours following the procedure and refraining from using makeup products for a while.
Just before the lamination:
- do not tweeze your eyebrows,
- avoid tanning beds and sunbathing,
- thoroughly remove your makeup and cosmetic residues from your eyebrows,
- do not perform mechanical or chemical peels around them.
Following eyebrow lamination, avoid:
- contact with water for 24 hours after the treatment (including washing your face, swimming pool or sauna),
- touching your eyebrows for 24 hours following the brow lift,
- use of tanning beds or sunbathing before 2 days after DIY eyebrow lamination,
- using cleaning products around the eyebrows, especially those that contain alcohol or AHA and BHA acids,
- washing the face with hot water (24 hours after the procedure) – high water temperature can negatively affect the lifespan of effects of the lamination effects, and brow hairs may change their shape, so it is better to use lukewarm or cool water.
Eyebrow lamination at home with a ready-made kit – summary
Eyebrow lamination at home is an easy and safe treatment that you can do yourself provided you use the right products. The key is to choose a good brow lamination kit that will allow you to achieve the desired results. It’s important to maintain hygiene during the brow lamination process and use the right tools, such as brushes or disposable applicators. Once the brow lift is complete, it’s a good idea to apply some oil to your eyebrows to nourish and moisturize brow hairs, leaving them more shiny.
I hope your eyebrows will look even more beautiful from now on! Let me know in the comments which brow lamination kit you would choose 🙂
PS. Remember that everyone’s skin and eyebrows are different, so the effect may vary slightly. If you have any doubts or unexpected side effects especially if you are prone to allergic reactions, consult a dermatologist or cosmetologist.
![My 4 Favorite Kits For Brow Lamination At Home [RANKING]](https://feelthebeauty.co.uk/wp-content/uploads/2022/04/diy-eyebrow-lamination-628x275.jpg)
