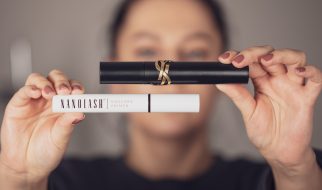
Beautiful, healthy, and thick – yes, I also want my eyelashes to look like that. However, I am currently struggling with the complete opposite effect. Tired of eyelash curlers and dozens of lash products, I decided to reach for something completely different. I opted for an at-home lash lamination. I chose Nanolash Lash Lift Kit. What can I say about it?
Why did I laminate my eyelashes with the Nanolash Lash Lift Kit?
Ladies, you may call me stingy, but when I saw the prices of the treatment in professional beauty salons, I was a little discouraged. Although I always pay attention to beauty products and don’t regret spending money on them, I couldn’t spend that much on a 30-minute treatment.
What’s more, the effects of a lash lift are not permanent. Often, they are no longer visible after 8 weeks, and the eyelashes return to their original shape. This is what prompted me to do this treatment myself at home. All I had to do was find the right product.
I managed! I chose Nanolash Lash Lift Kit. Why? For a simple reason. This is the brand with the best online reviews and has been providing women with products with beneficial effects on eyelashes for many years.
I ordered the lift and lamination kit which arrived at my doorstep a few days later!
Applying and testing – my impressions of the lash lift with Nanolash!
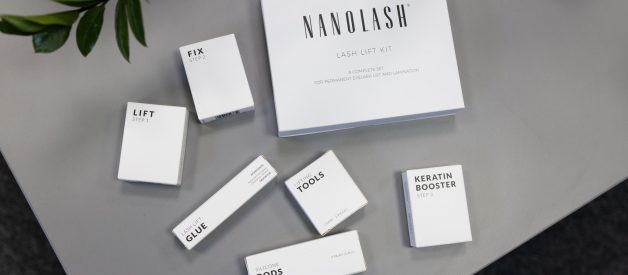
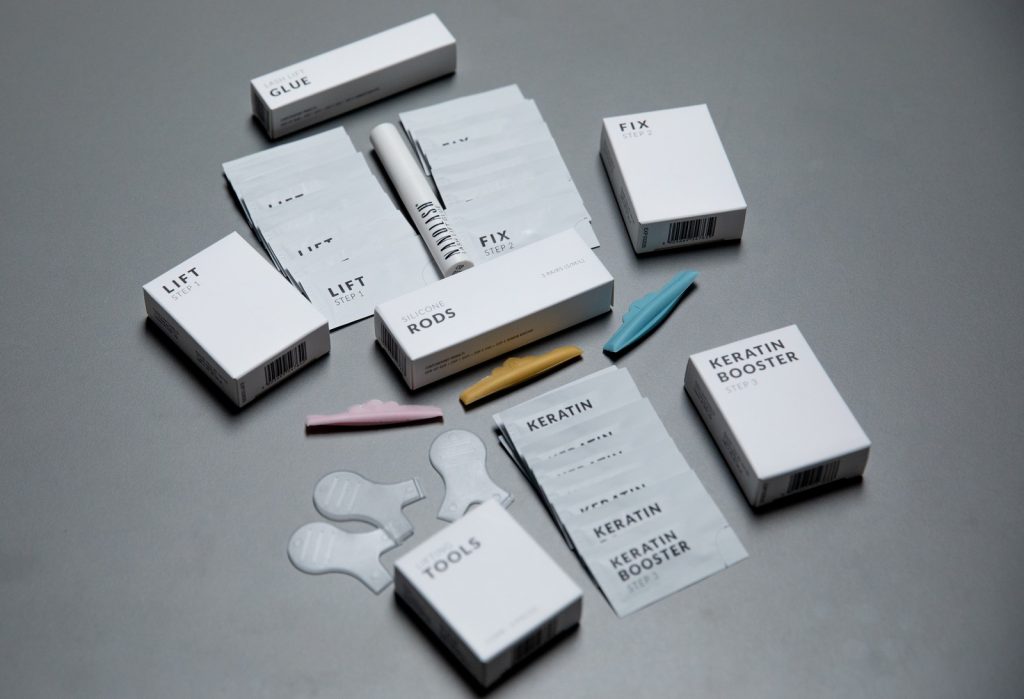
The box arrived to me protected and was extremely aesthetically pleasing. I set about unpacking it. Inside I found:
- 3 eyelash-laminating products – 10 x 0.5 milliliter sachets of each;
- Lash Lift Glue with a capacity of 5 milliliters;
- 3 pairs of rods made of silicone in sizes S to L;
- other accessories to facilitate and enable you to perform at-home eyelash lamination.
Everything seems complete, what’s more: a single Nanolash Lash Lift Kit allows you to carry out 10 treatments in your own home. These are my favorite kinds of products. I know that I can save money with them and achieve the desired results at the same time.
The lash lamination at home was very simple. All you need to do is prep your eyelashes – clean them of mascara and other products, separate the top and bottom lashes for easier application, and attach the rods close to the lash line.
The products are numbered in the order in which they should be applied. I carefully applied the product to my lashes from the roots to the tips. I didn’t rush but focused on being precise.
I kept each product on my eyelashes for 7 minutes – the manufacturer indicates that you should keep them on from 7 to 10 minutes. Then I washed off the first layer and applied another one. The products did not run off or irritate my eyes or the delicate skin around them.
I took the rods off. The effect…I have no words to describe it!
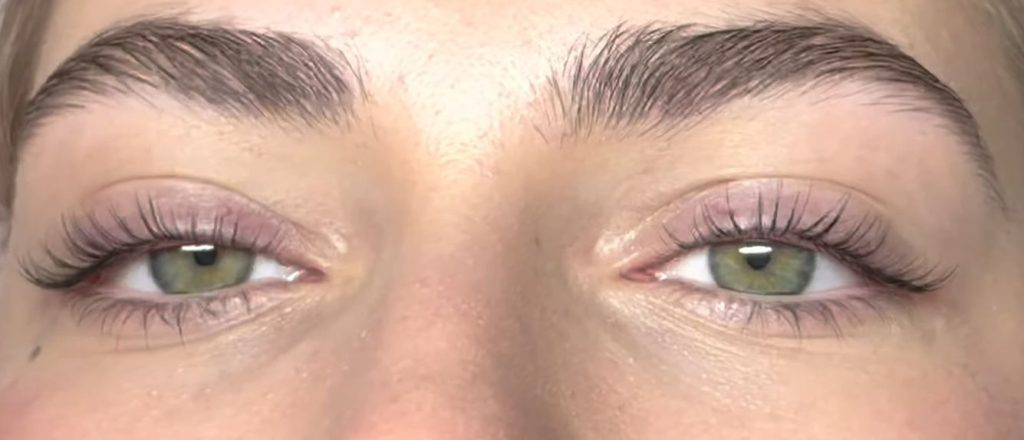
My eyelashes looked:
- noticeably and beautifully curled but maintained a natural look;
- longer and thicker;
- nourished and moisturized – this is certainly determined by the natural and safe formula of the products in the Nanolash lift kit.
Was I satisfied? That’s an understatement! I gave up the further use of my eyelash curler, and one mascara coat became completely sufficient. My eyelashes never looked as good as they do now for a whole 8 weeks!
Nanolash lash lift and lamination kit – summary
Finishing my review of the lash lift and lamination kit from Nanolash, I can only say that I have no regrets! Thanks to it, I performed eyelash lamination at home while saving my time and money.
The eyelashes were revived and looked beautifully defined and curled. The effect lasted as long as the producer declared. I have absolutely no reservations and can recommend Nanolash Lash Lift Kit to all of you. See for yourself the results you can achieve with it!